 0
0


Digital Light Processing (DLP) 3D printing is revolutionizing how hobbyists, makers, and professionals approach resin 3D printing. DLP 3D printing delivers exceptional detail, smooth surfaces, and rapid print times compared to point-scanning methods. Whether you are crafting detailed miniatures, dental models, or functional resin prototypes, digital light processing can be a powerful tool!
What Is DLP 3D Printing?
DLP 3D printing is a subset of vat-based additive manufacturing where a digital projector—often utilizing a Digital Micromirror Device (DMD)—projects UV or visible light to cure complete layers of liquid photopolymer resin at once.
DLP 3D printing relies on a vat of light-sensitive resin. Each layer is formed when the projector casts a slice of the 3D model onto the resin surface, solidifying the exposed areas simultaneously. This approach results in remarkably crisp layer lines, producing prints with fine detail and a polished finish right off the build plate. Because each layer cures in a single exposure, resin 3D printing via DLP often achieves faster print times for small to medium-sized objects. The result is greater accuracy in intricate geometries—think tiny text, delicate lattice structures, or microscale features.
Whether you are printing jewelry prototypes or functional parts, DLP 3D printing excels where resolution and speed matter most.
How Digital Light Processing Works
1. Slicing the 3D Model
Import your 3D model (typically in STL or OBJ format) into the slicer software.
The slicer divides the model into a series of two-dimensional cross-sectional layers.
Adjust layer height settings (e.g., 25–100 microns) and generate support structures as needed.
2. Preparing the Printer
Fill the resin vat with the chosen photopolymer resin.
Level the build platform to ensure a consistent first-layer adhesion.
Verify the projector and optics are clean and free of obstructions.
3. Projecting the First Layer
The build platform lowers into the resin vat until it’s a set distance above the resin’s transparent window.
The DLP projector flashes the first layer’s image onto the resin surface, curing that entire cross-section in seconds.
UV or visible light emitted by the projector selectively polymerizes the liquid resin into a solid for that layer.
4. Peeling and Raising
Once the first layer is cured, the build platform moves slightly upward (or the vat moves downward), creating a thin gap between the cured layer and the transparent cellulose or Teflon film.
The peeling action allows the uncured resin to flow beneath the cured layer, preparing for the next exposure.
5. Curing Subsequent Layers
The build platform repositions so the newly exposed surface is once again at the correct focal distance.
The projector flashes the next layer, solidifying the resin in the exact shape of that layer.
The layer bonds to the previous one, building the object vertically, layer by layer.
6. Repeating Until Completion
Steps 3–5 repeat for each slice of the model, with the projector exposing each complete layer in succession.
Because each layer is cured in a single exposure, total print time depends primarily on the number of layers, not on feature complexity.
7. Final Layer and Part Removal
After the last layer is cured, the build platform rises fully out of the resin vat.
The completed part remains attached to the build platform, ready for removal.
Excess resin is drained or poured back into the resin container through a fine mesh filter.
8. Post-Processing Initiation
Remove the part from the build platform—typically using a scraper or spatula.
Proceed with support removal, rinsing, drying, and post-curing to achieve full mechanical strength.
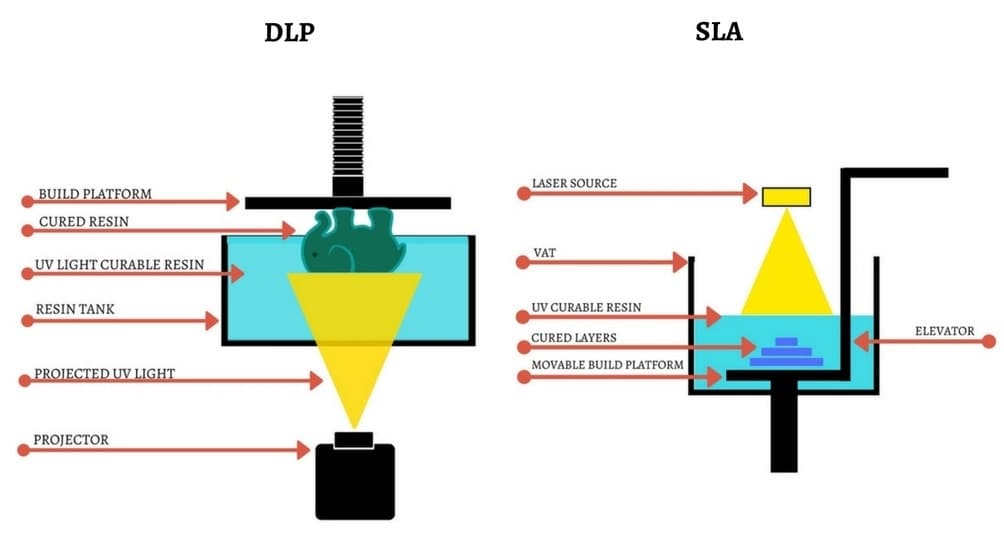
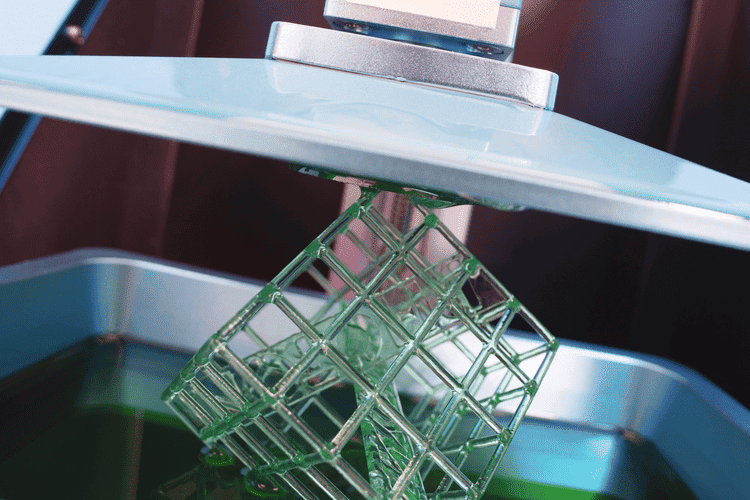
Image Courtesy of Manufactur3D
DLP Printable Resins
|
Resin Types |
Key Properties |
Typical Applications |
|
Standard (General-Purpose) |
• Balanced tensile strength |
• Concept models |
|
Tough & Durable |
• High impact resistance |
• Functional prototypes |
|
High-Temperature |
• Heat deflection temperature up to 200 °C+ |
• Molds for casting |
|
Flexible / Rubber-Like |
• Shore A hardness ranges (e.g., 50–90 A) |
• Gaskets and seals |
|
Dental & Biocompatible |
• ISO 10993 / FDA compliance |
• Dental models (crowns, bridges) |
|
Castable |
• Clean burnout (no ash) |
• Jewelry wax patterns |
Advantages of DLP 3D Printing
Superior Detail and Surface Finish
Because a digital projector cures each pixel in a single exposure, DLP prints achieve fine layer lines—often in the 25–50 micron range—yielding smooth, high-resolution surfaces that require minimal post-processing.
Fast Layer Curing
Exposing an entire layer at once dramatically reduces print times for small to medium-sized objects. While SLA scans point-by-point with a laser, DLP’s full-layer curing can finish the same cross-section in mere seconds.
Consistent Light Distribution
With a uniform projector-based light source, DLP ensures even curing across the build plate. This consistency leads to predictable shrinkage, accurate dimensions, and fewer “soft” areas caused by uneven exposure.
Scalability and Throughput
Since DLP cures one layer at a time regardless of part complexity, you can print multiple small objects simultaneously without significantly impacting print time. This capability is valuable for dental labs—printing several dental models in the same batch—or jewelry designers producing multiple wax patterns.
Wide Material Selection
From engineering-grade 3D printed resin to medical-grade biocompatible options, DLP printers often support a broad ecosystem of third-party materials. Users can select resins optimized for mechanical strength, flexibility, or specific certifications, enhancing the versatility of DLP 3D printing.
Limitations of DLP 3D Printing
Build Volume Constraints
Many desktop DLP printers have smaller build platforms because projector resolution and optics become more expensive and complex at larger scales. If your project requires large parts, you may need to print in sections or consider alternative technologies.
Higher Material Costs
Photopolymer resins generally cost more per liter than FDM filaments. Specialty formulations (like biocompatible or castable resins) can be significantly more expensive, impacting the cost-per-part for large batches.
Complex Post-Processing
After printing, DLP parts require thorough rinsing (typically in isopropyl alcohol or specialized cleaning solutions), meticulous drying, and a secondary UV post-cure to achieve full mechanical properties. Each step adds labor and time to the overall workflow, which may be a drawback for those seeking a “print-and-go” experience.
Support Design and Removal
Many DLP prints—especially those with overhangs or delicate details—need support structures. While most slicer software can auto-generate supports, manually refining them can improve surface quality. Removing these supports can leave small blemishes or require additional sanding, which may be time-consuming for intricate parts.
Resin Sensitivity and Shelf Life
Photopolymer resins degrade over time if exposed to ambient light or heat. They should be stored in opaque containers at controlled temperatures to maintain performance. Improper storage or prolonged exposure to UV light can result in yellowing or inconsistent curing.
Post-Processing of DLP Printed Resin
1. Support Removal
Carefully detach the build plate and remove the part. Use flush-cutting pliers or specialized resin cutters to snip supports at their base. Work slowly to avoid cracking thin features. After removal, gently file or sand support contact points with fine-grit sandpaper (e.g., 400–600 grit) to achieve a smooth surface.
2. Rinsing
Submerge the resin part in a bath of isopropyl alcohol (IPA) or a dedicated resin-cleaning solution. For best results, use an ultrasonic cleaner or gently agitate the bath for 2–5 minutes to dislodge uncured resin from crevices. Rinse until the wash fluid runs clear—any residual resin can inhibit proper post-curing and lead to sticky surfaces.
3. Drying
Allow the washed part to air-dry completely, or use compressed air to blow out IPA from hard-to-reach areas. Ensuring all solvent is gone prevents surface tackiness and ensures uniform post-cure.
4. Post-Curing
Place the part on a rotating platform inside a UV curing chamber (typically 405 nm LEDs) for 10–30 minutes, depending on resin type and wall thickness. Rotate the part periodically to expose all surfaces evenly. Proper post-curing fully polymerizes the resin, maximizing tensile strength, hardness, and heat resistance. Some high-temperature or engineering resins benefit from an additional thermal cure step, so always follow manufacturer recommendations.
5. Surface Finishing
If you require an ultra-smooth finish, start sanding with 400 grit and progress to 800–1000 grit, focusing on areas where supports were removed. For transparent or clear resins, wet sanding followed by polishing compounds will yield optical clarity. For colored or opaque parts, apply primer and paint as desired. Keep in mind that some resins adhere poorly to certain paints, so test a small sample first.
6. Inspection and Quality Control
Use calipers to check critical dimensions against your CAD model, particularly when printing functional parts. Evaluate layer adhesion, check for uncured pockets, and test any moving features (like snap-fit joints or threads) to ensure they function as intended. Document any deviations and refine your design or print settings for future iterations.
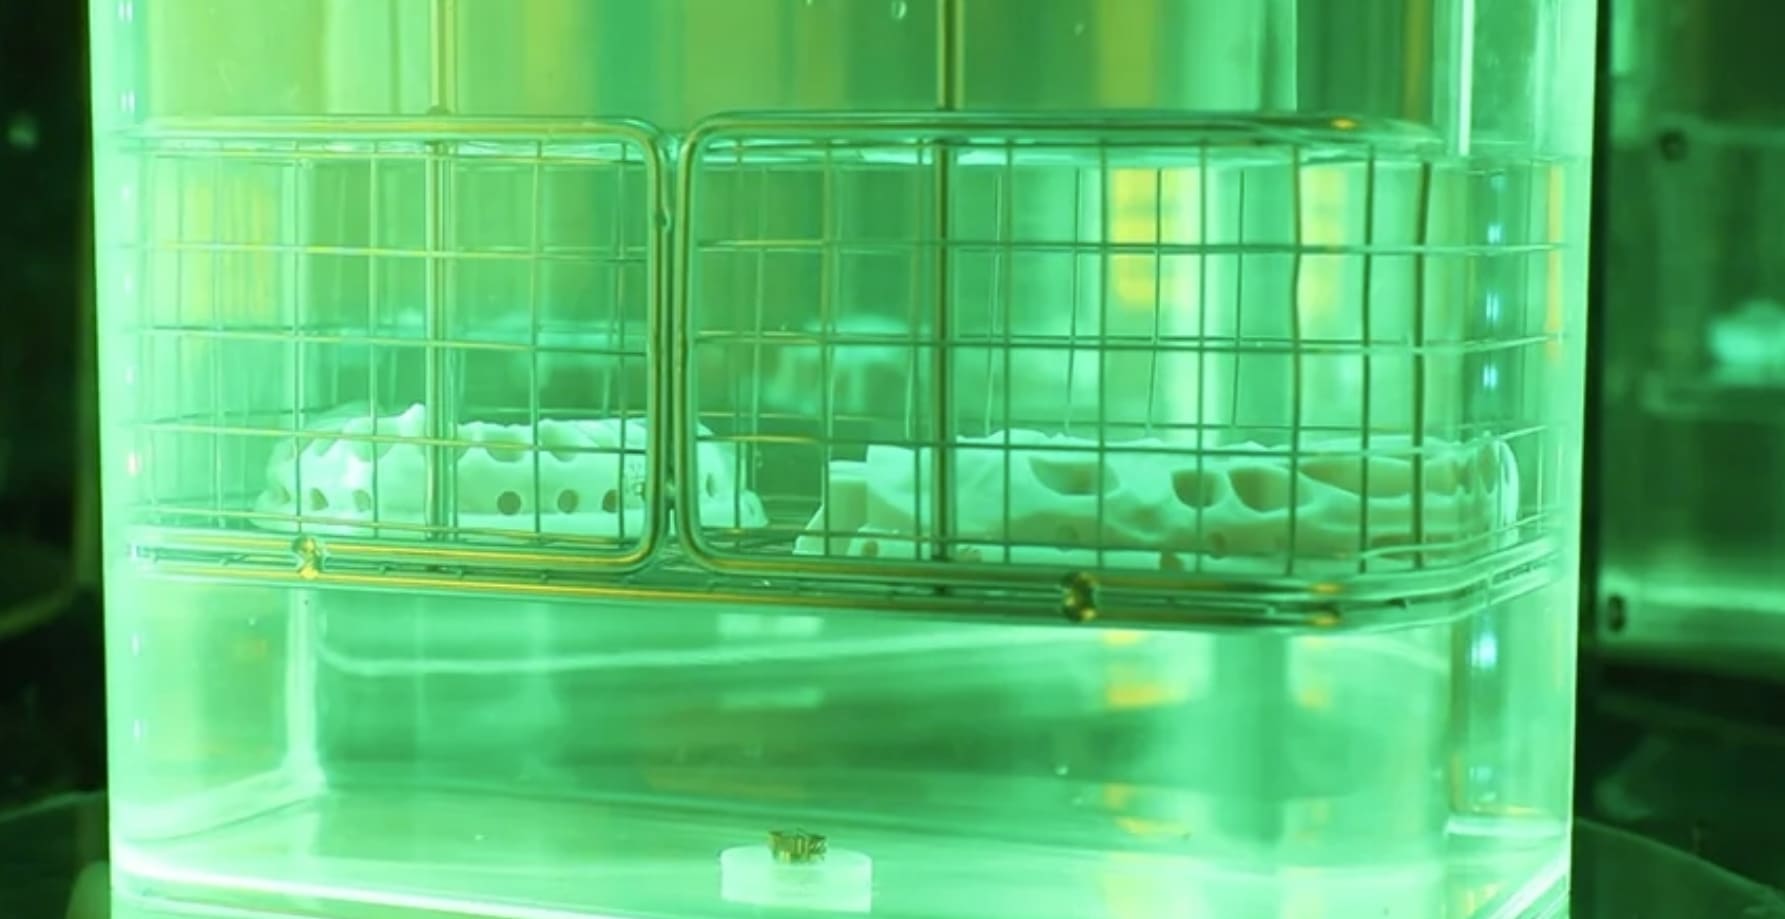
Image Courtesy of NOVA3D
Applications of DLP 3D Printing
Dental and Orthodontics
Dental labs use DLP printers to produce highly accurate dental models, surgical guides, and custom aligners. Biocompatible resins—approved by ISO 10993 and FDA—enable practitioners to create patient-specific crowns, bridges, and implant guides with minimal turnaround time.
Jewelry Design and Casting
Jewelers rely on DLP’s ability to reproduce exquisite details in 3D printed resin patterns. Castable resins burn out cleanly, leaving behind a flawless mold for silver, gold, or platinum casting, which streamlines the design-to-fabrication cycle, allowing rapid prototyping of rings, pendants, and ornate brooches.
Engineering Prototyping
Mechanical engineers employ DLP to fabricate functional prototypes with intricate features—gears, snap-fit housings, and fluidic channels—that are difficult to achieve with FDM. Tough and high-temperature resins provide mechanical properties close to injection-molded plastics, enabling realistic form-and-fit testing.
Consumer Electronics Housings
For small, detailed enclosures—such as earphone shells or sensor housings—DLP offers a swift route from CAD to a working prototype. The fine resolution ensures seamless fitment of components, and custom engineering resins can provide the necessary flame-retardant or UV-resistant properties.
Medical Devices and Bioprinting
Beyond dental models, research institutions explore DLP for fabricating custom orthotic braces, hearing aid shells, and even scaffolds for tissue engineering. Biocompatible and implant-grade resins help push the boundaries of personalized healthcare.
Miniatures and Hobbyist Models
Tabletop gamers and model enthusiasts cherish DLP’s ability to produce finely detailed miniatures—character figurines, terrain accessories, and scale models—often requiring only minimal cleanup before painting. The smooth surface finish reduces sanding time, letting hobbyists focus on painting and customization.
Microfluidics and Electronics
Researchers utilize DLP’s micron-scale resolution to develop microfluidic channels, microreactors, and electronic sensor housings. Specialized resins with embedded conductive or ceramic particles expand the technology’s reach into the rapid prototyping of advanced devices.
Image Courtesy of Formlabs
Comparing DLP to SLA 3D Printing
|
Aspect |
DLP 3D Printing |
SLA 3D Printing |
|
Light Source & Curing Method |
• Digital projector (DMD) flashes an entire layer at once • Pixel-based curing, uniform across the build area |
• Focused UV laser traces each layer point by point • Continuous laser path produces each layer’s contours and infill |
|
Print Speed |
• Fast for small to medium parts (entire layer cures in one shot) • Print time largely independent of feature complexity |
• Slower when layers have large cross-sections or intricate details (laser must traverse all paths) • Can be faster for very large simple parts |
|
Resolution & Surface Quality |
• X–Y resolution determined by projector pixel pitch (often 50–100 µm) • Crisp detail, but very fine curves may show pixelation |
• Laser spot size can be as small as 25 µm • Ultra-smooth curved surfaces with minimal visible layer lines |
|
Material Ecosystem |
• Broad third-party resin support (engineering, dental, castable) • Many open-system options |
• Large variety of compatible resins, including specialty formulations • Some resins optimized specifically for laser curing |
|
Cost Considerations |
• Generally more affordable desktop machines • Open-system models allow lower per-part material cost |
• Higher initial cost for laser module and optics • Maintenance (laser alignment) can add to long-term expenses |
|
Build Volume & Scalability |
• Limited by projector resolution—scaling up projector optics is costly • Printing many small objects does not greatly increase print time |
• Often larger build volumes available due to scanning area of laser • Print time increases with number of objects per layer |
|
Light Uniformity & Accuracy |
• Uniform exposure across each layer (fewer “soft” spots) |
• Highly accurate beam positioning, but potential variability if mirrors or optics drift |
|
Best Use Cases |
• High-detail small/medium parts where speed matters (miniatures, dental models, jewelry patterns) • Short-run production |
• Ultra-high-precision parts requiring perfectly smooth curves • Large-scale prototypes or functional parts |
FAQs
Q: Why do my prints warp or detach during printing?
A: Warping or print failures in resin 3D printing often stem from inadequate adhesion between the first few layers and the build plate. Ensure your build plate is leveled correctly—many DLP printers have automated or assisted leveling routines. Clean the plate surface to remove cured resin residue or oils with isopropyl alcohol. Some users apply a thin layer of resin to “prime” the plate before starting a print. Additionally, excessive peel forces during layer separation can cause detachment; reducing layer thickness or adjusting peel settings (if your printer allows) can help mitigate this issue.
Q: What’s the best way to store unused resin?
A: Photopolymer resins degrade when exposed to ambient light and high temperatures. Store unopened resin bottles in a cool (15–25 °C), dark place. Once opened, keep the resin sealed in an opaque container or bag to minimize UV exposure.
Q: Can I print multi-material objects with DLP?
A: Most consumer-grade DLP printers are designed for single-resin use per print.


